Pages

Sunday, September 26, 2010

creative color

Getting to decorate a kid's room is always fun and challenging.  You want it to be fun but not something that would be overstimulating.  You want it to reflect their personality but also give them room to grow.  And, you want them to love it!

Before:  A new house, a new bedroom... time to make it feel like home for a precious 3 yr old.  A frilly out dated valance said it all.  This room hadn't been touched since the 80's!


After:  The little girl had picked out her own bedding, which was bright and very colorful.  I didn't want to paint the room a bright color as well so I decided that a focal wall would work best.  It is fun, energetic and colorful but isn't so loud that it is overwhelming.

I painted the walls a soft white that would be the perfect backdrop for more colors and for the artwork she is sure to add as she gets older.


The carpet had to stay the same but with more color throughout the room it sort of fades away and lets everything else shine.


For some reason, the little girl was really scared of her closet doors but her parents didn't want to take them down so I tried to make the doorway a little more fun and a lot more colorful for her.  The beads were a success and the saloon doors don't even bother her anymore.

Saturday, September 25, 2010

downsizing and moving on

Staging this house was so fun!  There wasn't a lot of furniture because the homeowner has slowly been donating her belongings so it would be easier to downsize but we still had plenty to work with.  Thanks Kristie for helping me out on this staging project!  Kristie has a staging business and she is absolutely fabulous!


Before: The furniture in the living room was too spread out and the accessories on the mantle were too small.


After:  We found a much larger piece of artwork for the mantle and kept the accessories simple.  We took out the large recliner, moved the couch up about 4 feet and brought in 2 wing back chairs that help create a cozy sitting area.


Before:  The dining room was dark and oppressive.


After:  We took out the red drapes but left the valance.  That move alone brightened the room considerably!  We also took down the iron artwork and put up pictures that brought in more contrast.  We took the leaf out of the table so the dining room would seem bigger and used the captains chairs in other rooms in the house.


Before: The kitchen was pretty but it lacked that Something Special to catch the eye of buyers.


After:  We brought in a table and chairs for the eating area, cleared clutter off counters and brought in stylish but simple accessories for the glass cabinet.


Before:  Once again, heavy curtains overpowered the room.


After:  We didn't want to leave the homeowner without privacy so we tucked the drapes back as far as they would go instead of taking them down.  Brought in one of the chairs from the dining room and now the room is balanced and welcoming.

I am so impressed with the small personal touches Kristie remembers to add.  She is the bed staging pro!


Before: The guest suite in the walk-out basement didn't say Come stay awhile!  


After:  We rearranged the furniture and took off the dated bedding.  Simple changes that made a BIG difference.


Before: The guest bathroom had one small flower on the wall.  That needed to go!


After:  Just switching out the artwork made a big difference here.


Most of the remaining rooms in the house were empty but now the ones with furniture look good!

Friday, September 24, 2010

simple southwestern

My clients needed a LOT of help.  They needed help picking paint colors, arranging furniture, organizing clutter and most of all they needed help turning their home into a place that reflected them!  The entire downstairs was on our To Do list.

Before:  The living room and dining room were the very first thing people saw when they walked in.  It was out-dated and the toys and drum set had taken over.  The fireplace surround was hideous and brought too much attention to itself... and not in a good way!


After:  We tore down the fireplace tile and pine.  We installed a vent free fireplace and because of that we were able to put to good use the former chimney. We also got a great storage system from Pottery Barn that helped us organize all the toys.  We picked a warm paint color that would be a good back drop for their artwork and southwestern accent colors.


In the dining room we painted a terracotta color on the walls and put up a fabulous cornice board.  We also took out the large hutch since it was full of dishes they never used and we brought in an amazing chandelier that combines simple lines and a southwestern feel.


Before:  This is the hallway bathroom/laundry room.  Do I have to say anything??


After:  Well, obviously we took down the wallpaper!  Re-tiled the floor and created a custom built/tiled vanity.  New lighting, new faucet and a custom roman shade (with the same fabric as the dining room cornice) finished off the room.  I absolutely LOVE this bathroom!


Before:  This kitchen had no personality whatsoever!  bland bland bland....oh, and cluttered.  It was not a place the home owners enjoyed spending any time.


After:  I searched high and low for a counter top solution that was in our budget.  We finally decided on a laminate that had a neutral updated color.  We tiled the backsplash and added a custom cafe curtain over the sink.  Once again, the wallpaper came down.  We used the same paint color as the living room so there would be flow throughout the entire downstairs.


We turned a screened- in porch into a sun room/drum room but I never got pictures because the home owners were doing the work on their own and weren't quite finished when everything else was done.  It was a great experience and a challenging one.  I learned a LOT and really enjoyed myself!

Thursday, September 23, 2010

Let's Get Staging (part 2)

As I learn my way around the blogging world I've decided to break some of my posts into 2 so I don't have quite as much to put together!

THE BEDROOMS
Before: The master bedroom of this house was also the office but the furniture layout gave absolutely no separation of the two.  It was a large room but the space wasn't used very well.

After:  We rearranged furniture (separating the office area from the sleeping area), changed the bedding, added curtains and took out the outdated over sized headboard.


Before: It's great for kids to have hobbies and interests and for their rooms to reflect that but when your home is on the market it is best to scale back and represent those passions simply.  This room was really small and seemed even smaller because you would trip over the bed when you walked in the room.  Time to rearrange!

After:  Once again, we rearranged furniture and added curtains.  We also took down the horse border and the 1 small piece of artwork on the walls.  It is better to have bare walls than something that is too small and awkwardly placed.


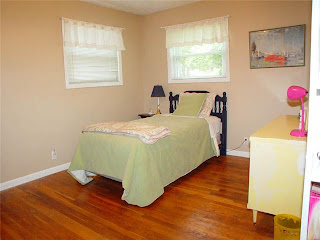
Before:  This bedroom was so sad and bland!  Clutter on the floors had to go and some life had to be brought in so buyers can imagine their children being at home there.


After:  We brought in a headboard for the bed, cheerful but neutral bedding, artwork and changed the floor plan.  We even brought in an armoire from the living room (unfortunately, I didn't get a picture from the other side of the room so you can see it) to give her more storage and with the new layout, it works perfectly!

So, you can see that with space planning and simple changes a huge impact can be made in your home!  I love how much we were able to do without spending much money.  

Tuesday, September 21, 2010

Let's Get Staging! (part 1)

This was my first solo staging project.  The family was absolutely wonderful but had NO budget so we had to be creative.  Thankfully craigslist and spray paint can solve many issues!

Before: First Impressions are incredibly important when your home is on the market. A room that is overcrowded yet under accessorized is not the impression you want to make.


After: We hung up artwork, took out the large coffee table, removed the large armoire and updated accessories.


Before: A large tv cabinet greeted prospective buyers when they entered the home. I know, it's really hard to arrange furniture in the long living rooms of most ranch style homes but when your home is on the market you have to reconsider furniture placement.


After: We moved a buffet from the dining room to replace the tv cabinet. We needed something that didn't block the line of vision and something that would create an entryway.


Before: The dining room was crowded yet bland.  It was a tight squeeze on all sides of the table.


After: We rearranged the furniture, replaced the lighting ($40 on craigslist and some spray paint), and brought in some simple accessories.  We also rearranged the dishes in the hutch so they would be more noticeable yet not too busy.


Before: The golden oak cabinets and the brass knobs made the kitchen feel so outdated!


After: We painted the kitchen, updated the knobs on the cabinets and brought in a valance to tie colors together.  Sometimes too much beige is really negative...even in a house on the market so we had to bring in some color!